The Xbox 360 is a pretty important console to me. I only started playing around late 2011, but it still provided countless hours of entertainment and the idea of a modding the console really appealed to me. Since then, I have learned a lot from the process such as basic system security and electronic skills.
The original KK exploit was a stepping stone to the SMC (JTAG) hack. The SMC hack will keep the JTAG ports enabled on the motherboard and by bypassing the eFuse technology, it allowed for a downgrade back to the 4532 kernel and rebooting into a custom firmware. I would recommend ModernVintageGamers video on this if you would like to learn more:
| [How the Xbox 360 Hypervisor Security was Defeated | MVG](https://www.youtube.com/channel/UCjFaPUcJU1vwk193mnW_w1w) |
Identifying the vulnerability and your console
The JTAG exploit is only vulnerable on PHAT consoles which have not been updated past summer 2009. This correlates to Kernel 7371. However, there are some slight exceptions. Notably, special edition Jasper consoles (2009) are not vulnerable such as the Resident Evil 5 and MW2. My friend purchased a new RE5 console for multiple hundreds to find out it’s not vulnerable, don’t do the same.
For reference, this is how to find out your motherboard type:  Motherboard identification guide Out of these consoles, you ideally would have a Jasper motherboard. These output the least amount of heat and have good heat sinks to prevent the infamous RRoD. However if you take a look at the date, there was a very small window in which these were vulnerable. Also, v2 Jaspers can be had before September. For example, the Arcade 512MB Big Block.
When it comes to dumping your NAND, you can also identify if your console is vulnerable by the CB value.
If it is on the following list, you are out of luck:
Xenon: 1922, 1923, 1940, 7373
Zephyr: 4571, 4572, 4578, 4579, 4580
Falcon/Opus: 5771
Jasper: 6750
I have had 3 Big Block JTAG Jaspers, and they have all been on CB 6723 which is vulnerable. I cannot comment for any other motherboard revision.
So in short, you are looking for:
- Dashboard 7371 or below (check CB for 7371)
- Ideally a HDMI console made on 2008-2009
Doing the hack - Components
There’s multiple wiring routes of doing the hack but I did the original wiring method. However this can differ by motherboard. In the case of a Xenon, the layout is slightly different to the rest of the 360 line. But among both methods, these are the components required:
- 2x 1N4148 Diodes
- 26-30 AWG Kynar wiring
- A NAND-X/JR-Programmer or a Matrix SPI Nand Flasher
- Soldering Iron
- Solder (60/40 rosin core recommended)
- Flux
Ideally you would also have:
- Heatshrink tubes
- Electrical tape
For the hack you will also need the following software:
- JRunner
- NAND device drivers
Doing the hack - NAND wiring
To proceed with the hack, we need to read the NAND of the console and ensure that we have at least 2 matching dumps. We will use these to create freeboot (hacked) images of our NAND that will allow for unsigned code to run. They can also be used to later restore to in the event that you might want to revert the hack. 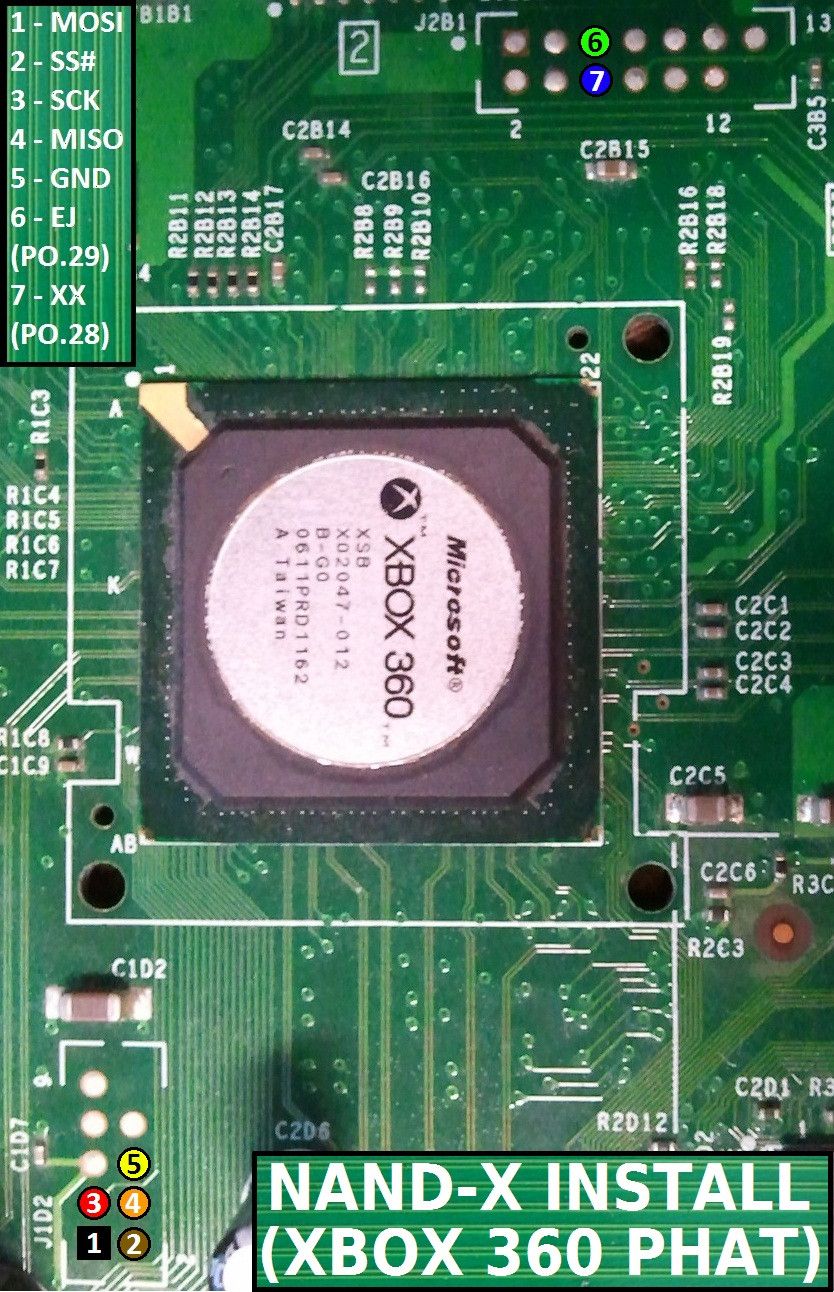 NAND-X / JR-Programmer wiring
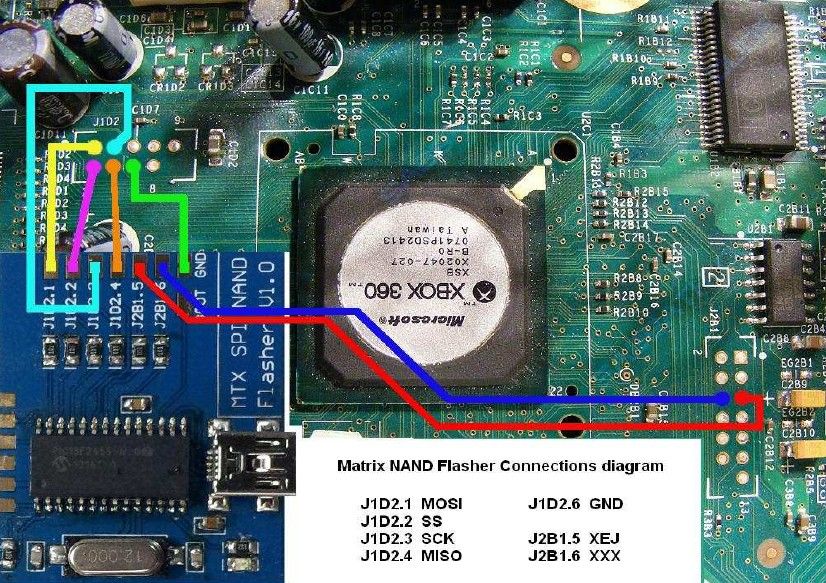 Matrix SPI Nand Flasher wiring Below are some *rough *images of how I did my install. Take note that I decided to use the hard drive connector as ground. This is much easier than using the point on the motherboard and I would personally recommend it to avoid unnecessary complications. Also ensure that you ‘tin’ the points (pre-apply solder). This creates a much easier surface to attach wires to.
 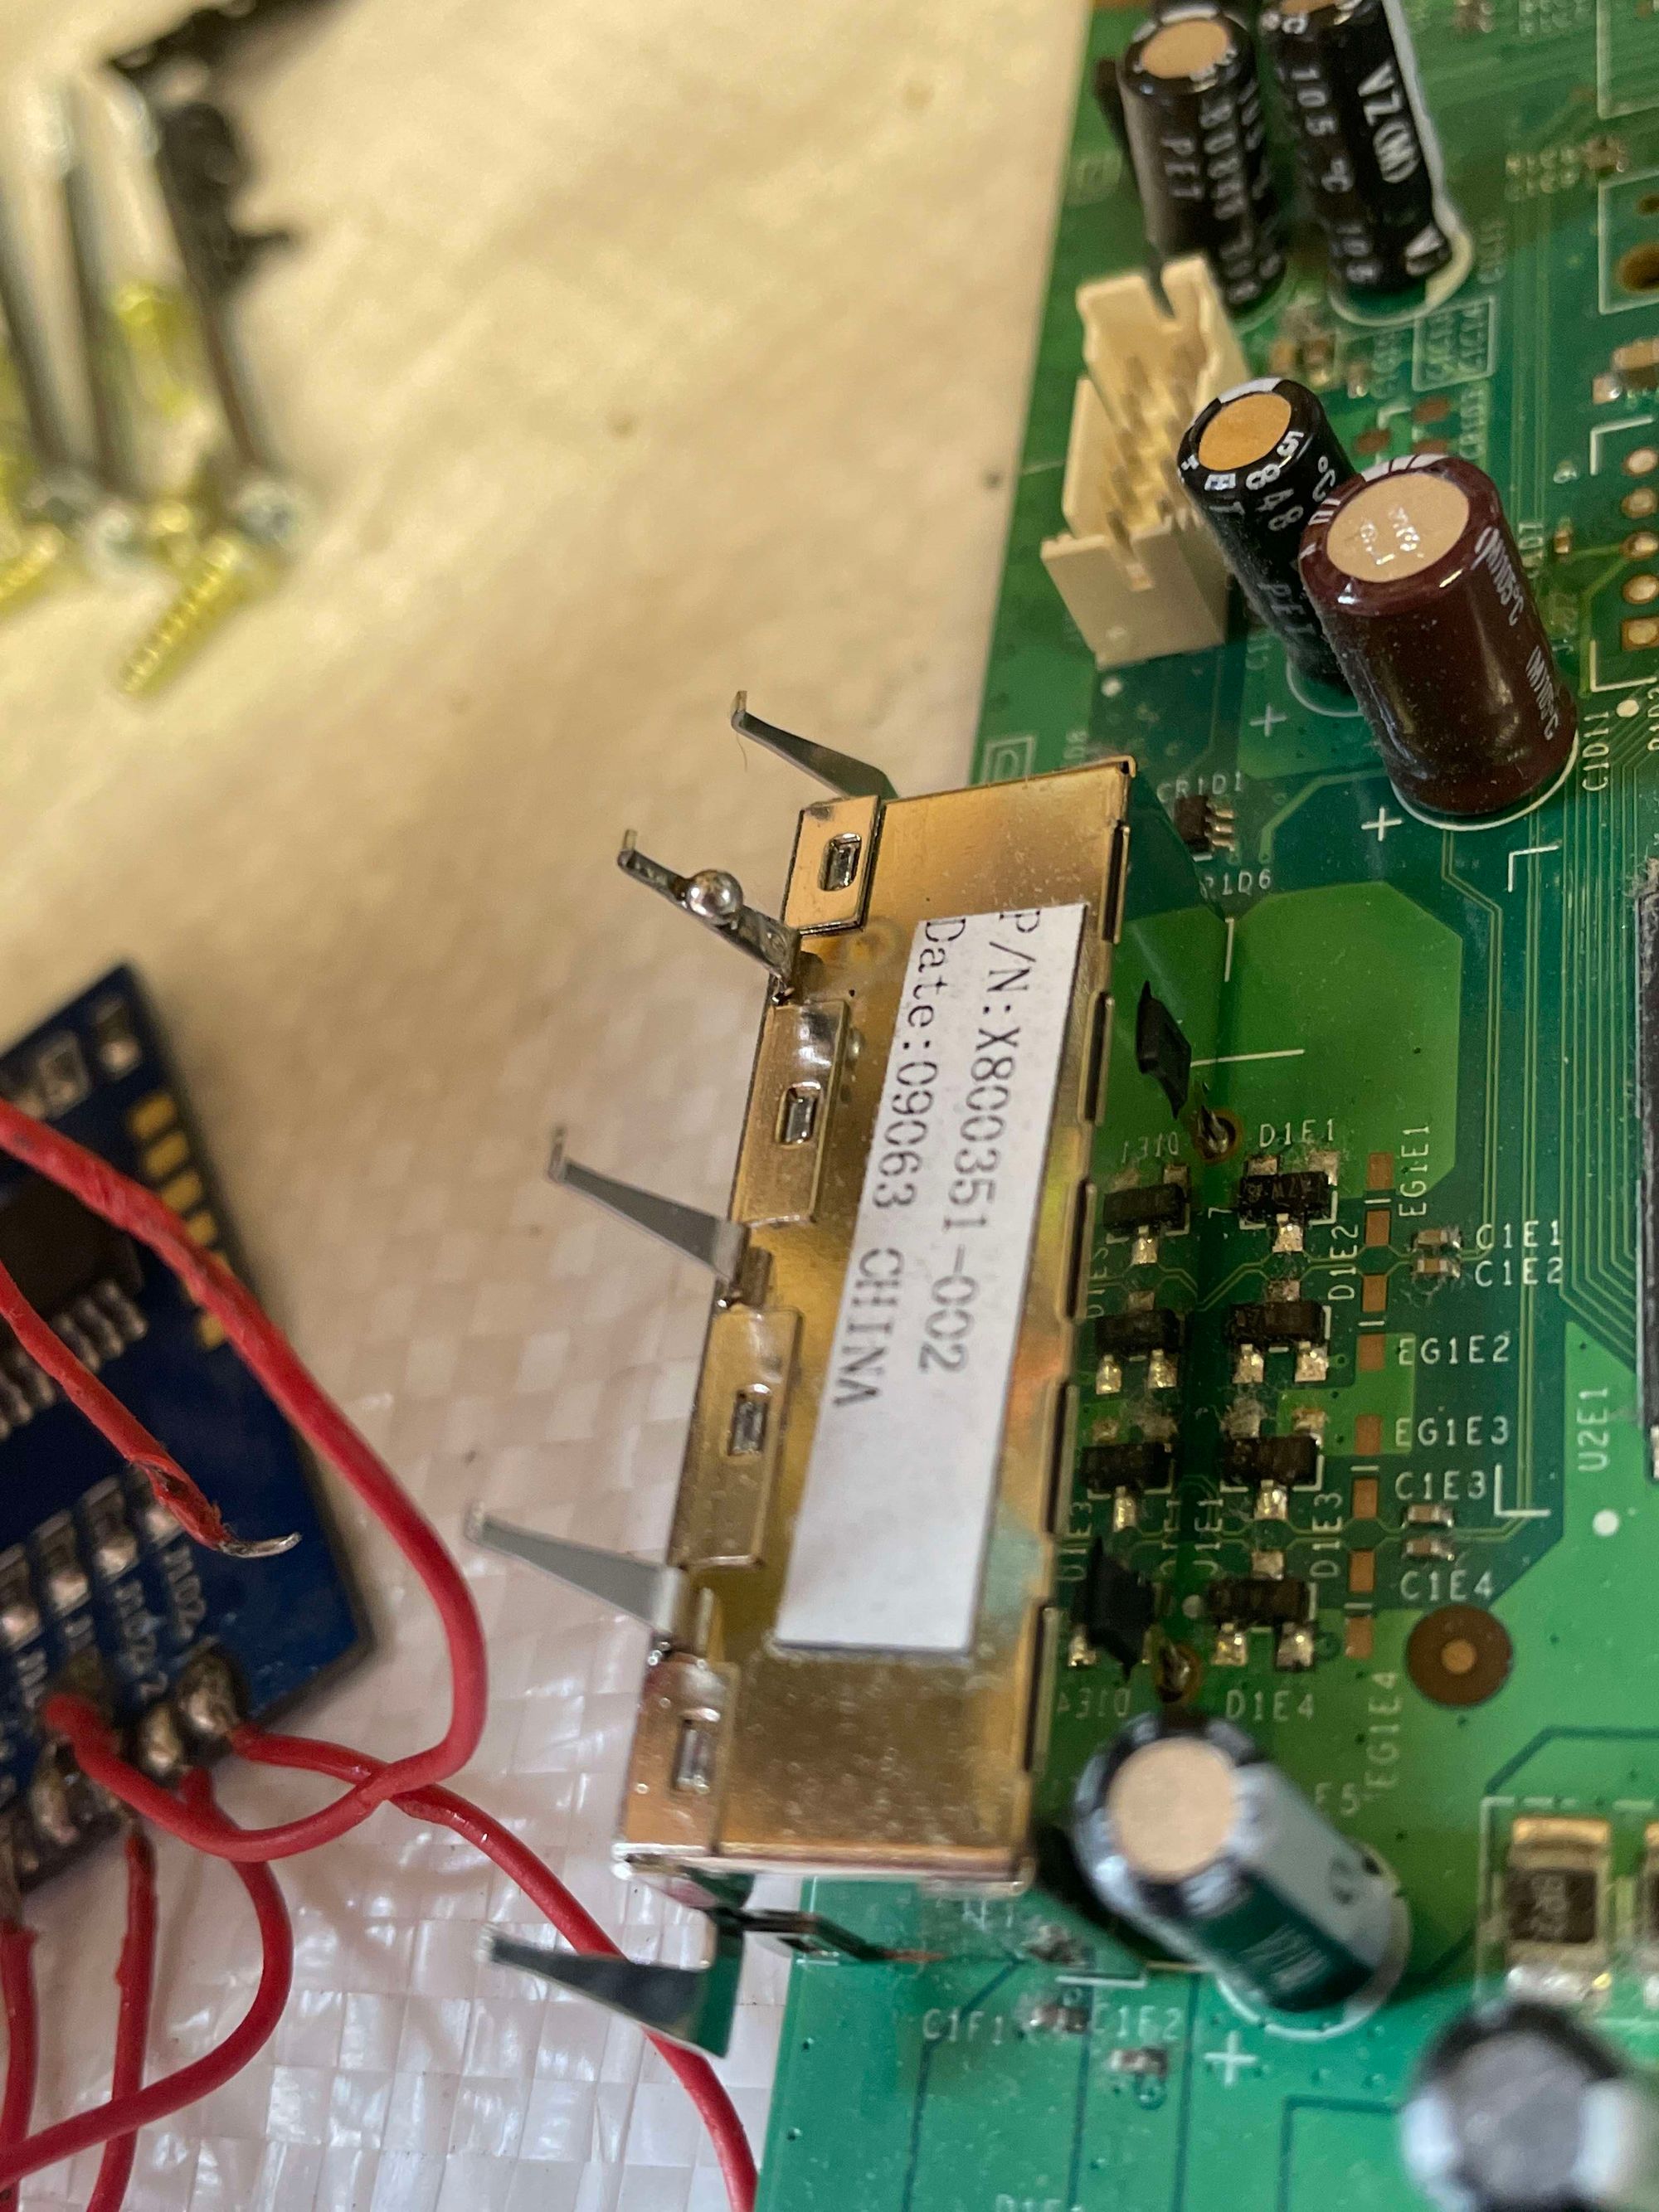 Using HDD prong for ground
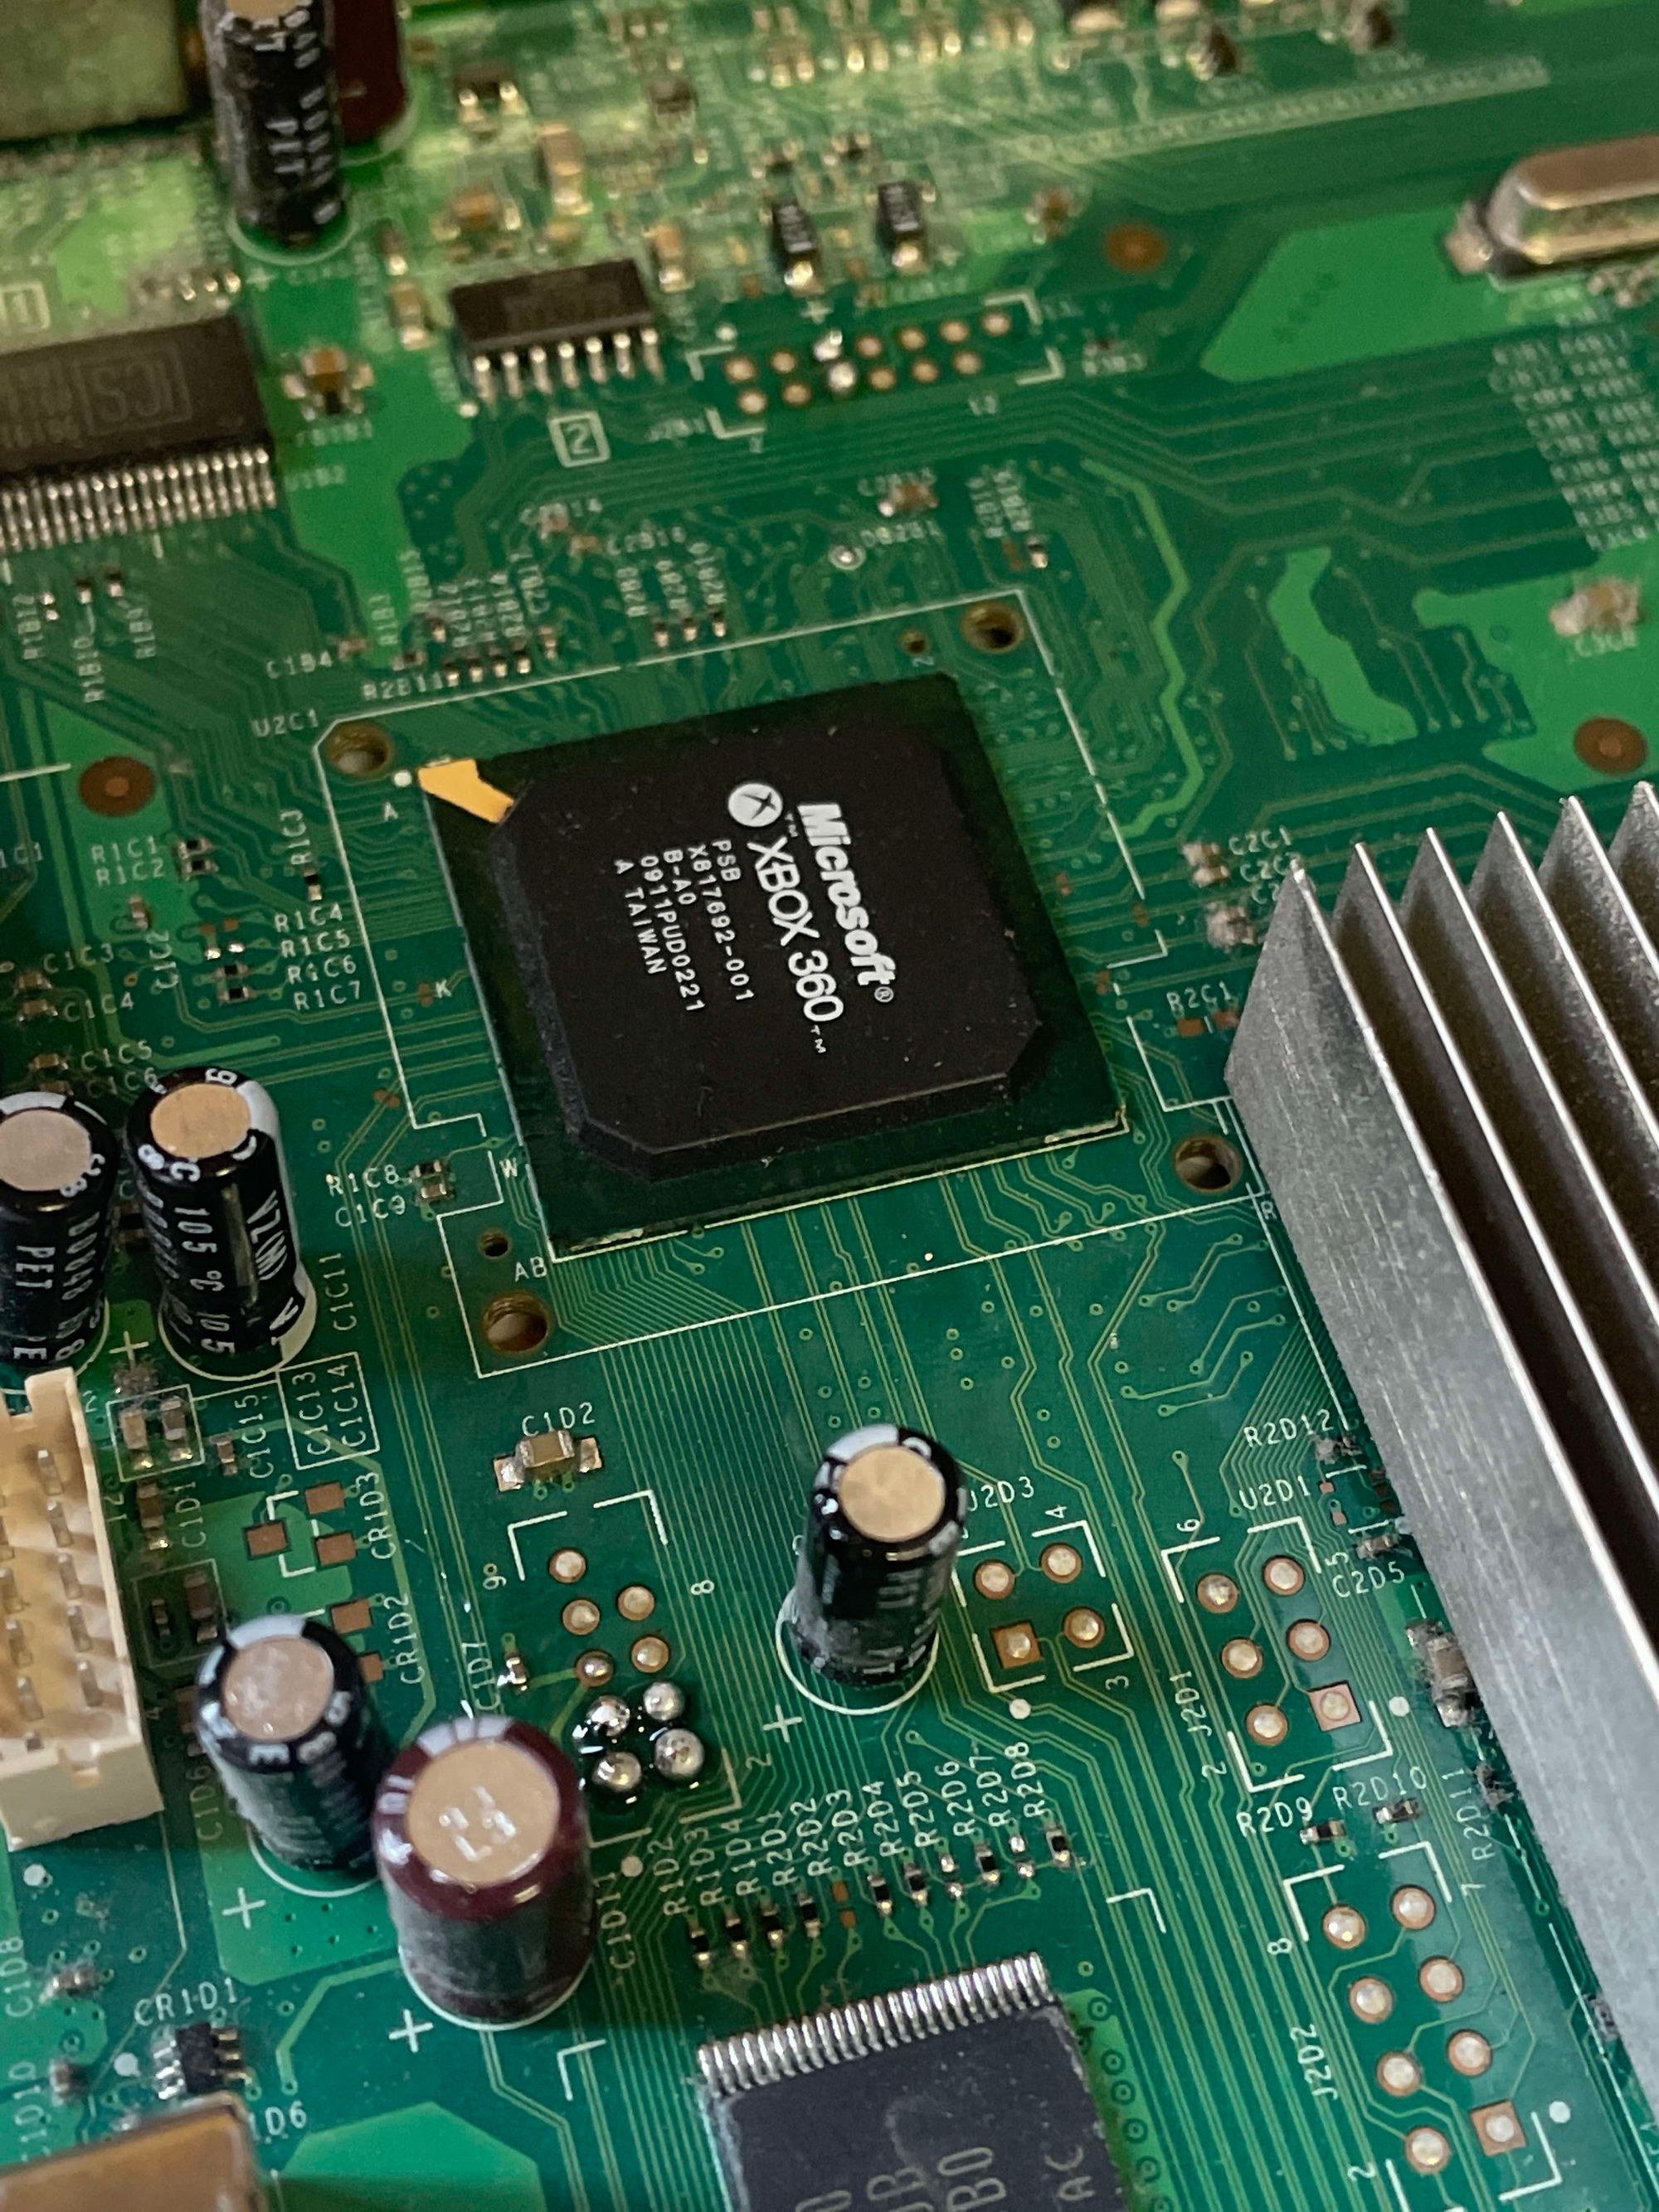 Tinned points on the motherboard for NAND reading. This is recommended.
 JR-Programmer installed It’s not too important that these wire’s aren’t very neat. They are only temporary while we do operations with the NAND.
Doing the hack - NAND Reading and Writing
At this stage, you should have the NAND headers installed. We will need JRunner to continue from this point. It can be found as a mirror on my website from here. Note that this install is covering the dashboard 17599. I expect this to be the final dashboard for the console, but if it’s not, it’s preferred you use the latest dashboard (although not required).
Open up JRunner. You should be presented with a screen like this:  JRunner dashboard It’s important that your NAND device is detected. Ensure the drivers are installed and hopefully you will see an image of it in the center under the write Nand button.
  JRunner dashboard with JR-Programmer detected Next, click the ? next to the Motherboard box.
Make sure your console has power BUT IS NOT POWERED ON.
If you power on your console while attached, you** WILL break** your programmer.This will query the flash config of your console, and if your wiring is correct, will return details about your console. Hopefully you have identified it as you have previously via the power+output or date of the console. If it worked, the output should fill with a flash config and a guess at your console type. Don’t worry too much if it’s not accurate, it just needs to work.  The ? to query the console Next, click Read Nand. I would recommend you do it 3 times however 2 is enough. This ensures that it will dump it and the checksums are the same and thus meaning the NAND dumps are the same. If you see a mention of bad blocks, don’t be alarmed. JRunner will map these to reserved areas which are used exclusively for this. I recommend you read this post on Free60 for more information.
  JRunner reading my NAND
After you have 2 reads, ensure that it says they are MATCHING NANDS. DO NOT PROCEED
If they are not matching NAND’s. These are your lifeline to verify any problems with your console.
Tick the JTAG box on the side with no other options. We are not using the AUD_CLAMP alternative install for this.
After this, click create XeLL Reloaded image and then proceeded by clicking Write XeLL Reloaded.  Creating a Xell-Reloaded image and writing. At this point your console should have the XeLL image written to the first 50 blocks. XeLL (Xenon Linux Loader) is used to grab our CPU Key which will decrypt our NAND and allow for us to reboot into a 4532 kernel. Disconnect your JR-Programmer but keep it soldered. We need it later.
Doing the hack - Physical Install
Now we get to do the fun stuff. Installing the JTAG hack. Below are some diagrams of how to install it for respective motherboards. Please note, the second image depicts a LPT cable. This is not required and only there for legacy methods. 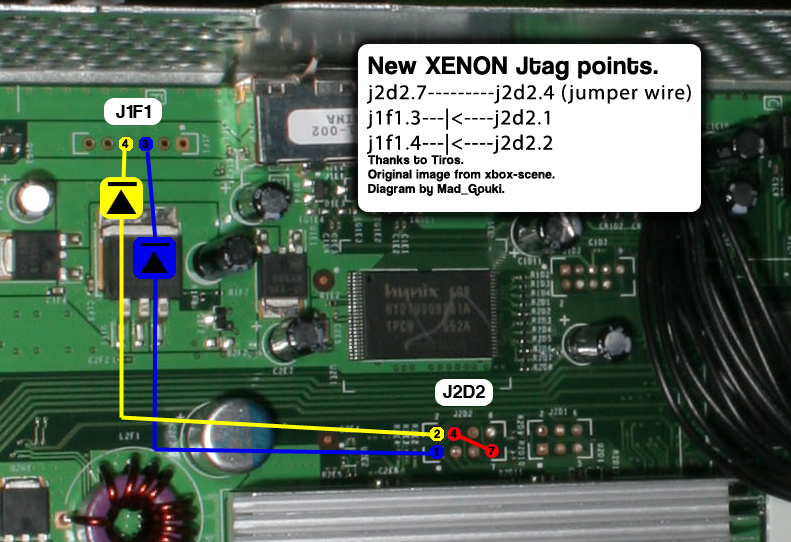 Xenon Motherboard JTAG wiring
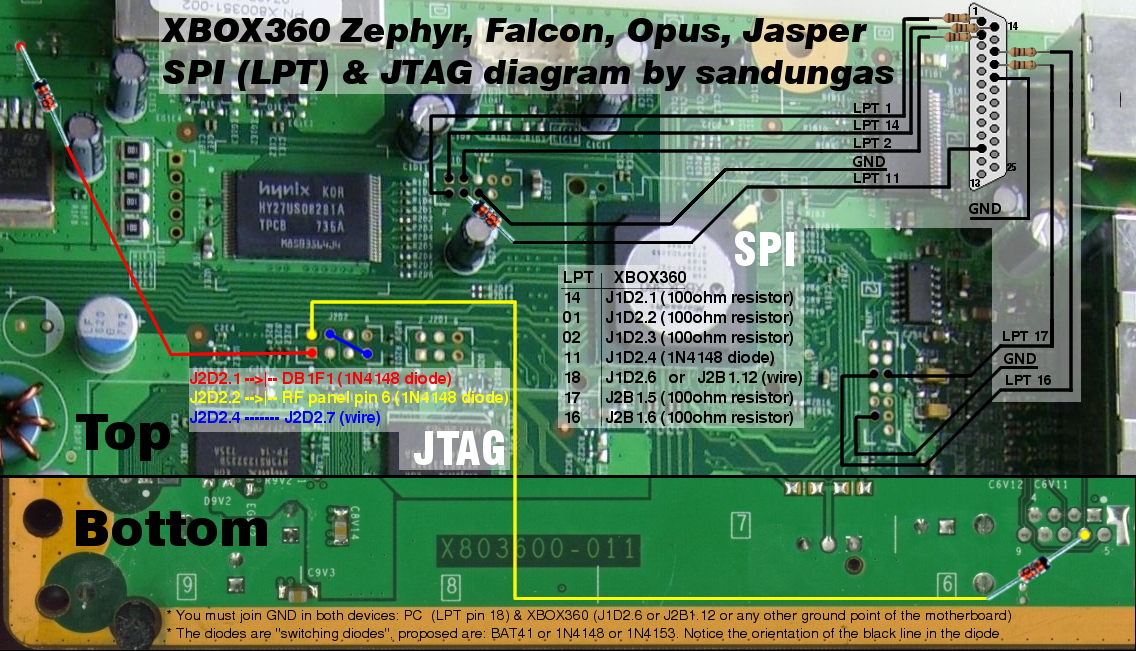 Zephy, Opus, Falcon, Jasper Motherboard JTAG wiring Some people prefer to use the diodes with direct connections to each point. However, I opted to use a bit of wiring with them when installing. This created a cleaner look but is functionally identical. Make sure you orientate the image the correct way when looking at it. However, ensure that you use shrink wrap tubes to prevent any sort of shorting. This is highly recommended!
There’s not much more to be said about this. It’s a relatively simple proceedure. Some guides will tell you to solder to the RF plate, but this is completely unecessary. Below is my wiring (following this guide). 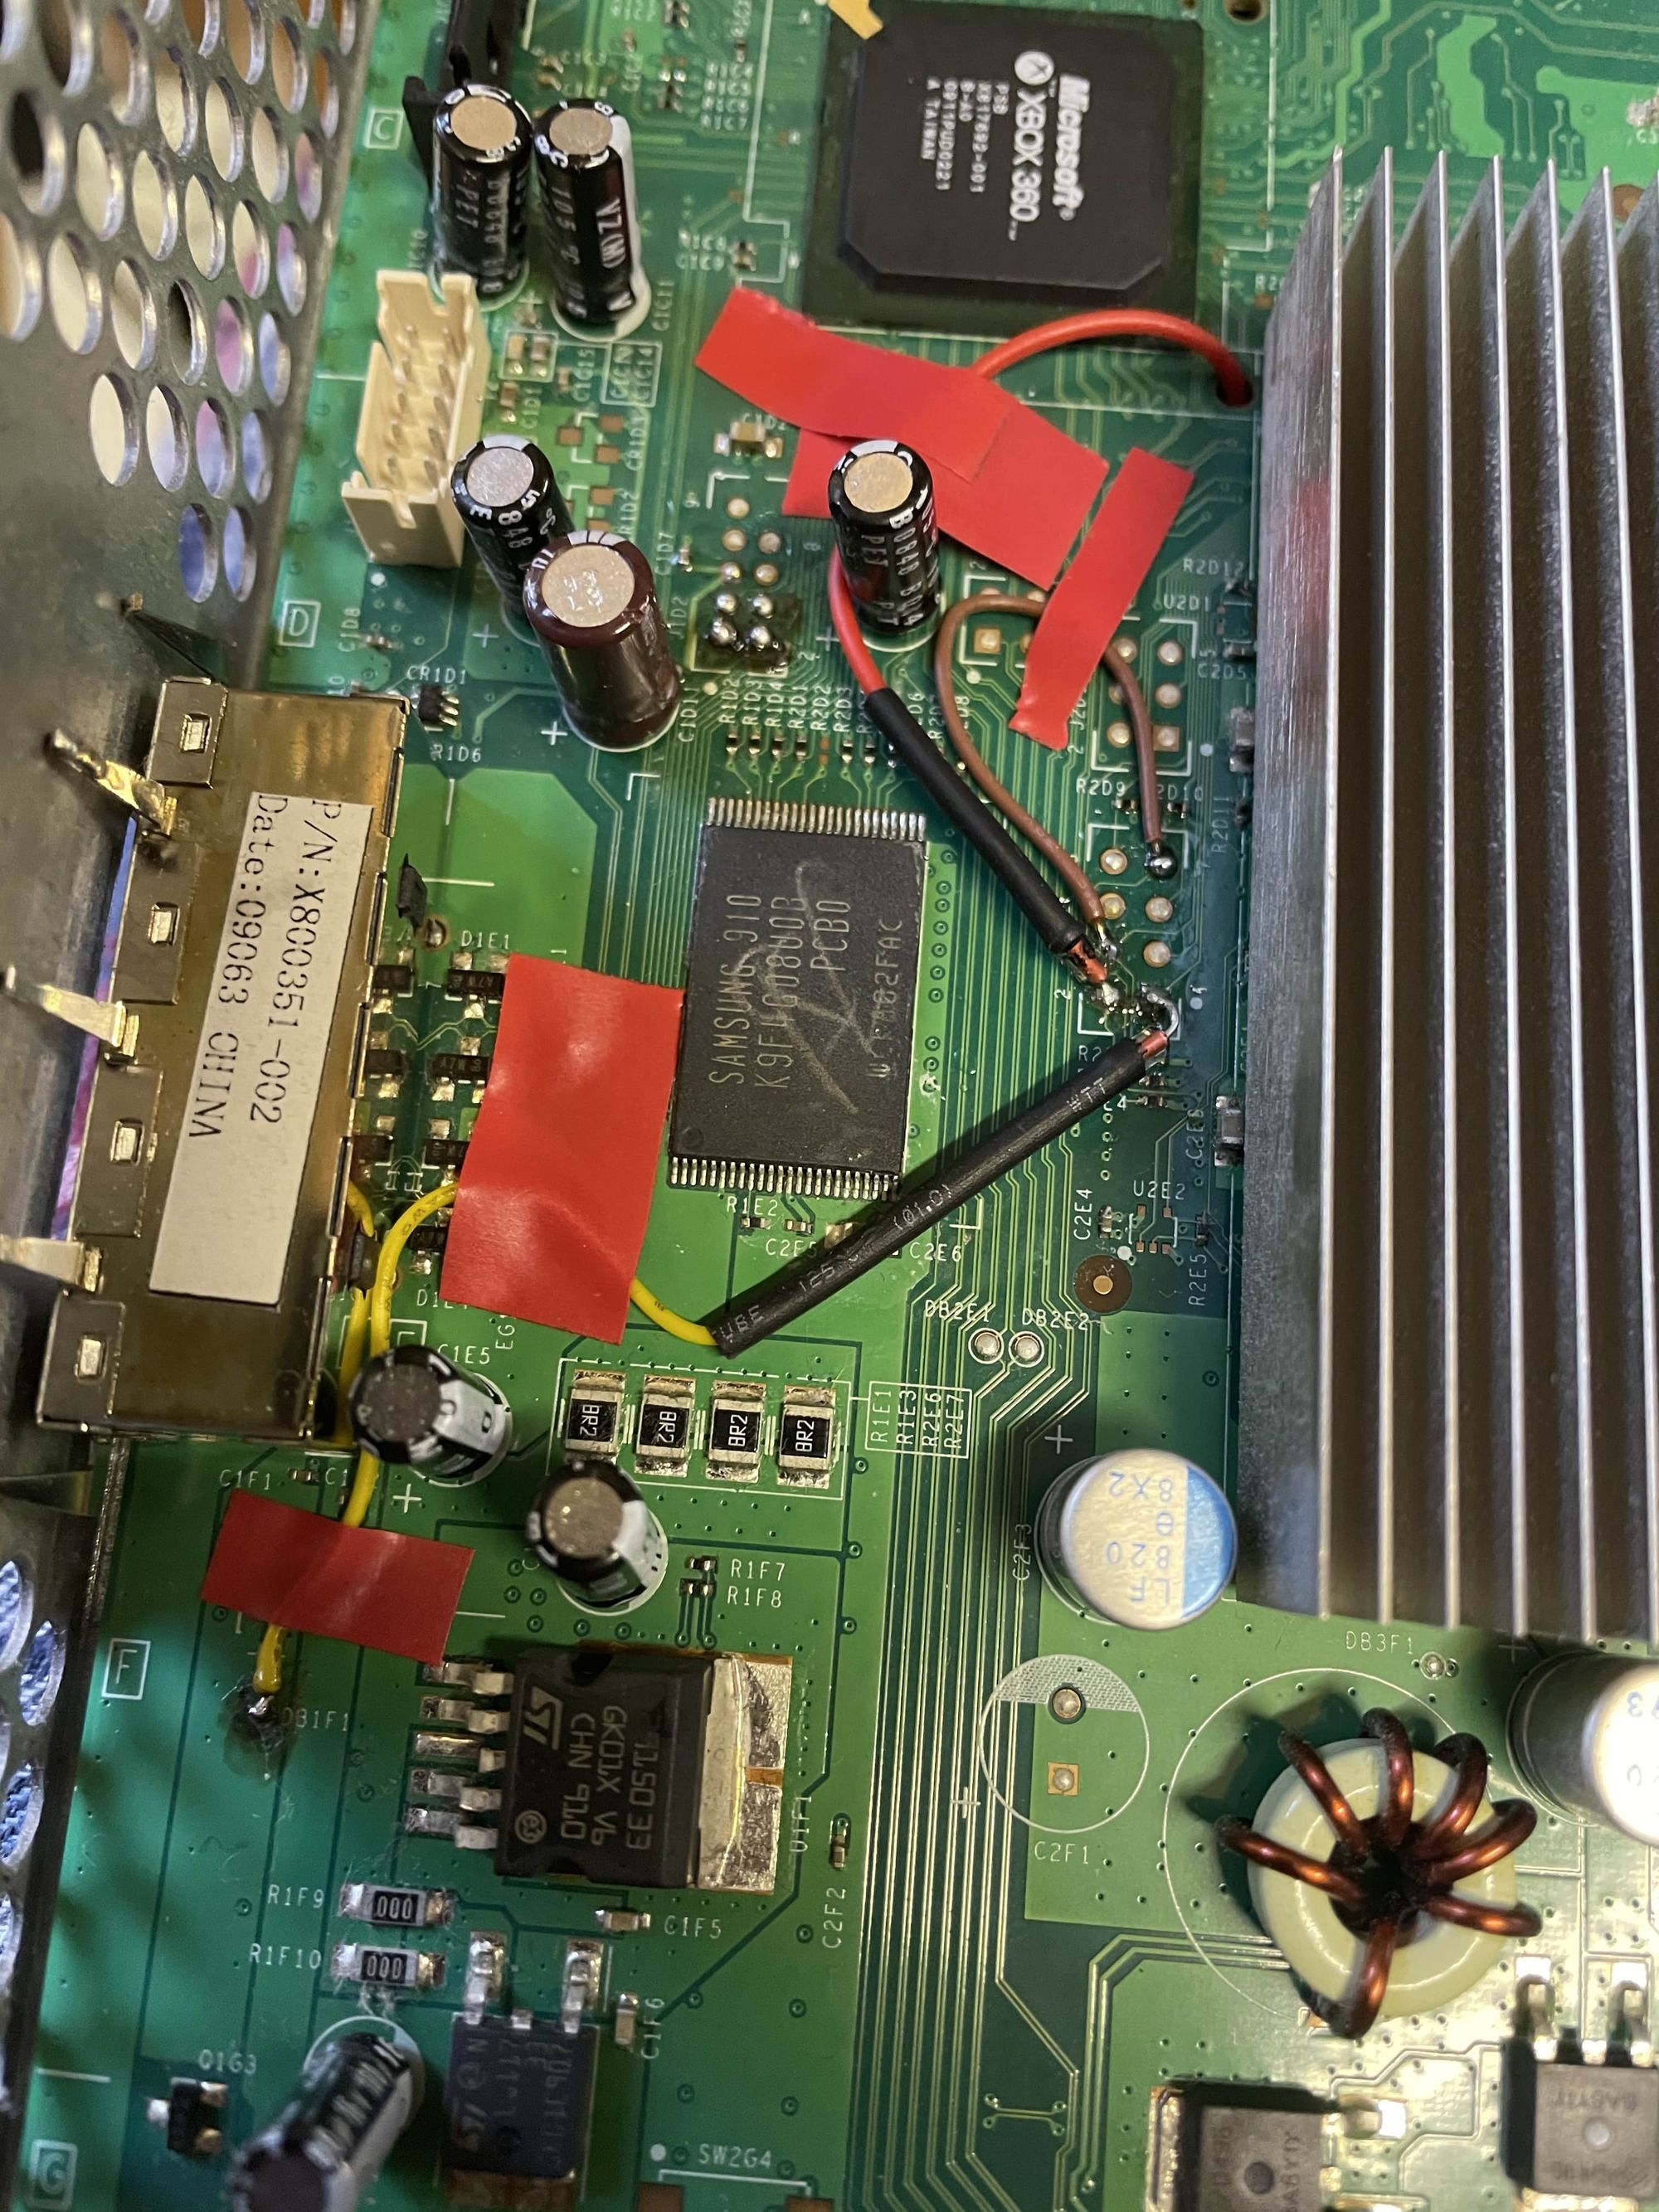 Final wiring. Note: Diodes are covered in shrink wrap but can be seen at the end
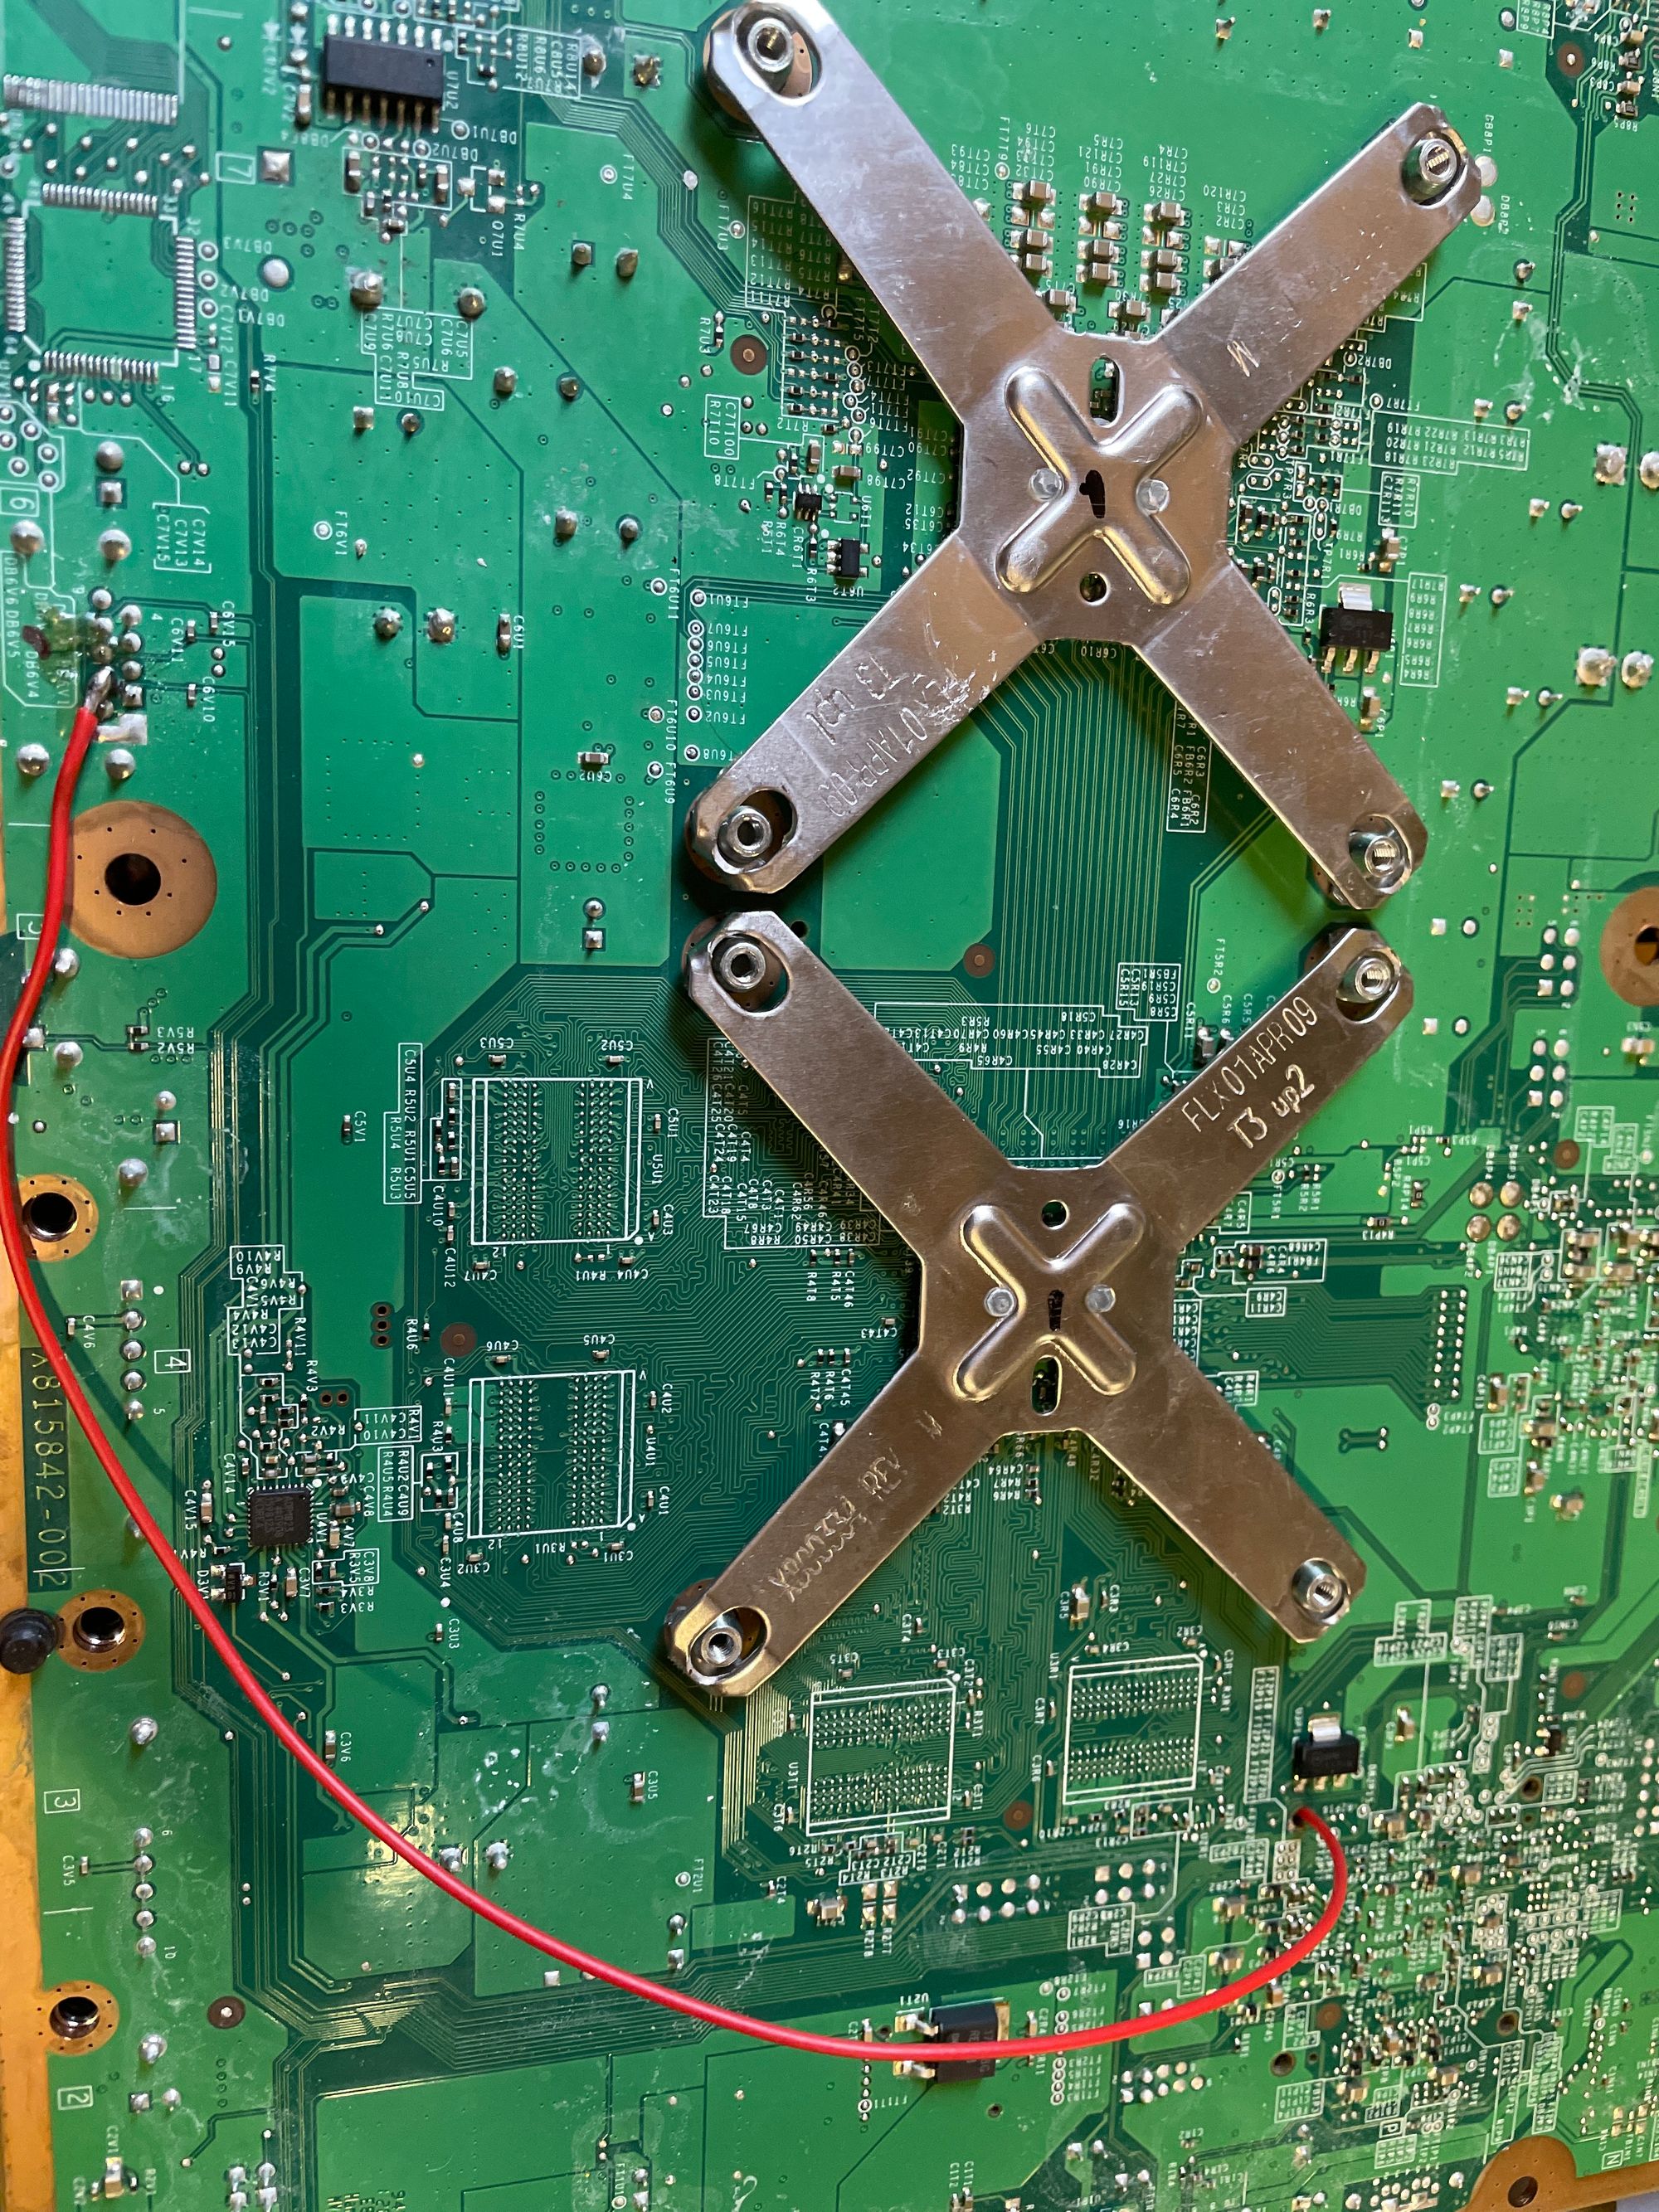
UNPLUG YOUR NAND DEVICE.
Put on your RF Plate and power up the console. Make sure to put in a video signal as well as a Ethernet cable. This will make it much easier to get your CPU Key
Doing the hack - Creating and Writing Freeboot
After the hack is installed and we have our CPU key, we want to turn off the console so that we can write our freeboot image. This will look like the regular dashboard but with the ability to run unsigned applications. If you do not want to write out your CPU Key, put the IP your console got in the bottom right and click Get CPU key.
On JRunner, ensure your NAND dump is on the source file and click Create XeBuild image. Once created, it will output a log of information such as your hack type, CPU key and other misc. information. These will be saved.  JRunner creating a XeBuild image At this point, you are at your final step.
TURN OFF YOUR CONSOLE.
Click Write Nand and it should begin to write the XeBuild image. After this, unplug everything
INCLUDING THE NAND READER
From your console and re-plug power and video and power on. Hopefully, you should be presented with the stock latest dashboard with a missing avatar.
Finale
That’s it. You might want to set a custom fan curve using a software like Dashlaunch and install XeX menu so you can browse the files on your console. These are paramount on any modded system, especially a phat, to help prevent a RRoD occurring.
It’s quite satisfying to load Dashlaunch and be presented with a JTAG hack. There’s a lot of significance to it as they are hard to come by. For note, you can always check your flash and console type in Dashlaunch at the bottom right.  Dashlaunch showing the JTAG hack type —
Final Thoughts
The JTAG hack was a very significant breakthrough in the ability to run homebrew on your own console. Even today, RGH or JTAG consoles are a great step up from the original XBOX homebrew scene. Emulators are present, lots of documentation on developing your own software and even the ability to play backup copies of your games. Lots of PHAT consoles experience a sticky or non-functional disc tray and this can be a great way to revive a console, assuming you have the hard drive space.
I would recommend the 360 to someone who is interested in capabilities of homebrew consoles. but I would not recommend it to someone who wants to mod games online. XBLive is nourished with people on modified consoles and I have my doubts at how long XBLive will even last. I’d imagine it also peaked a lot of interest from kids on how security and electronics work. I sure learned a lot from my years of using on.