This post is a continuation of my previous post, “Deploying a ‘CDN’ with GeoDNS”.
Reviewing this in 2023 - This is when I knew little about containers. Consider this a ‘test poc’ ;)
One of the many challenges I faced when creating my CDN was a method of updating the vHost configuration files among multiple PoP’s. At first I was manually creating and modifying the conf files on a base, none-containerised install of NGINX (CentOS 8). It dawned on me when working with a client from CubeOps to install Ghost in a container, that this would be the prefect time to finally get around to learning how to utilise docker for myself.
When researching how I should handle this, I realised that I had to learn how to create my own images and how to host them before deploying them. Hosting them at a service like Dockerhub does work, but there is a significantly less learning curve involved in that and giving out my data to GitHub is not a preferred method. Especially when it involves private keys…
The solution I settled on initially was hosting the registry and gitlab on the same machine in a separate container. Although I soon realised that GitLab had its own integration and container registry which would prove to make it significantly easier and less “hacky”.
Below is some of the steps I took to deploy this service:
Base system requirements
A server with the following criteria:
- At least 4GB of RAM
- 1 semi-powerful CPU core
- At least 10GB of storage
- A Linux distro of your choice (I chose Debian 10)
- Container technology capabilities.
I found that OpenVZ does not integrate well with containers by default unless the host specifically enables it. As such I recommend KVM.
DNS records
| Name | Type | Value | Required |
| gitlab | A | IP | Yes |
| registry | CNAME | gitlab | No |
The registry sub domain is not required unless you do not want to connect to your registry via a remote port. We will expose the registry via HTTPS later on. Feel free to setup a reverse proxy for it.
Installing GitLab (via Docker)
Installing GitLab is not a challenging task thanks to the power of containers. In fact, the hardest part about it would actually be the decision of how you would like to store your data. For this I decided that it would be best to store my configuration files on the host under /srv/gitlab.
docker run –detach
–hostname gitlab.example.com
–publish 443:443 –publish 80:80 –publish 5050:5050 –publish 5050:5050
–name gitlab
–restart always
–volume /srv/gitlab/config:/etc/gitlab
–volume /srv/gitlab/logs:/var/log/gitlab
–volume /srv/gitlab/data:/var/opt/gitlab
–env GITLAB_OMNIBUS_CONFIG=”external_url ‘https://gitlab.example.com/’;”
gitlab/gitlab-ce:latest
The above command will automatically pull and run a gitlab community edition image**. **If you want to deploy the enterprise edition, change it to gitlab-ee:latest. It will then allow the container to bind to the ports 80, 443, 5050 & 5555 which is all required. Next, it sets the omnibus variable within GitLab for our URL to https://gitlab.example.com. This variable will automatically deploy a LetsEncrypt certificate if there is HTTPS present at the start which we will utilise later on. Finally, we will name the container “gitlab” and make sure it automatically starts when the Docker daemon is loaded.
You can check the logs of this container by doing:
docker logs gitlab
GitLab should now be live at https://gitlab.example.com and accessible over HTTPS. After setting up a root password, you can login and be presented with your personal projects.
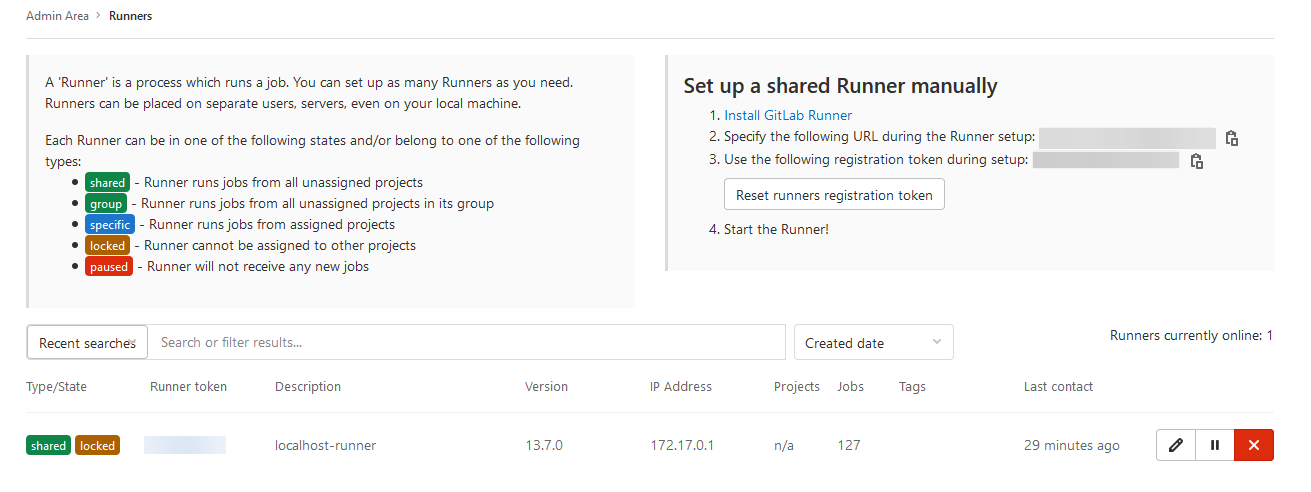
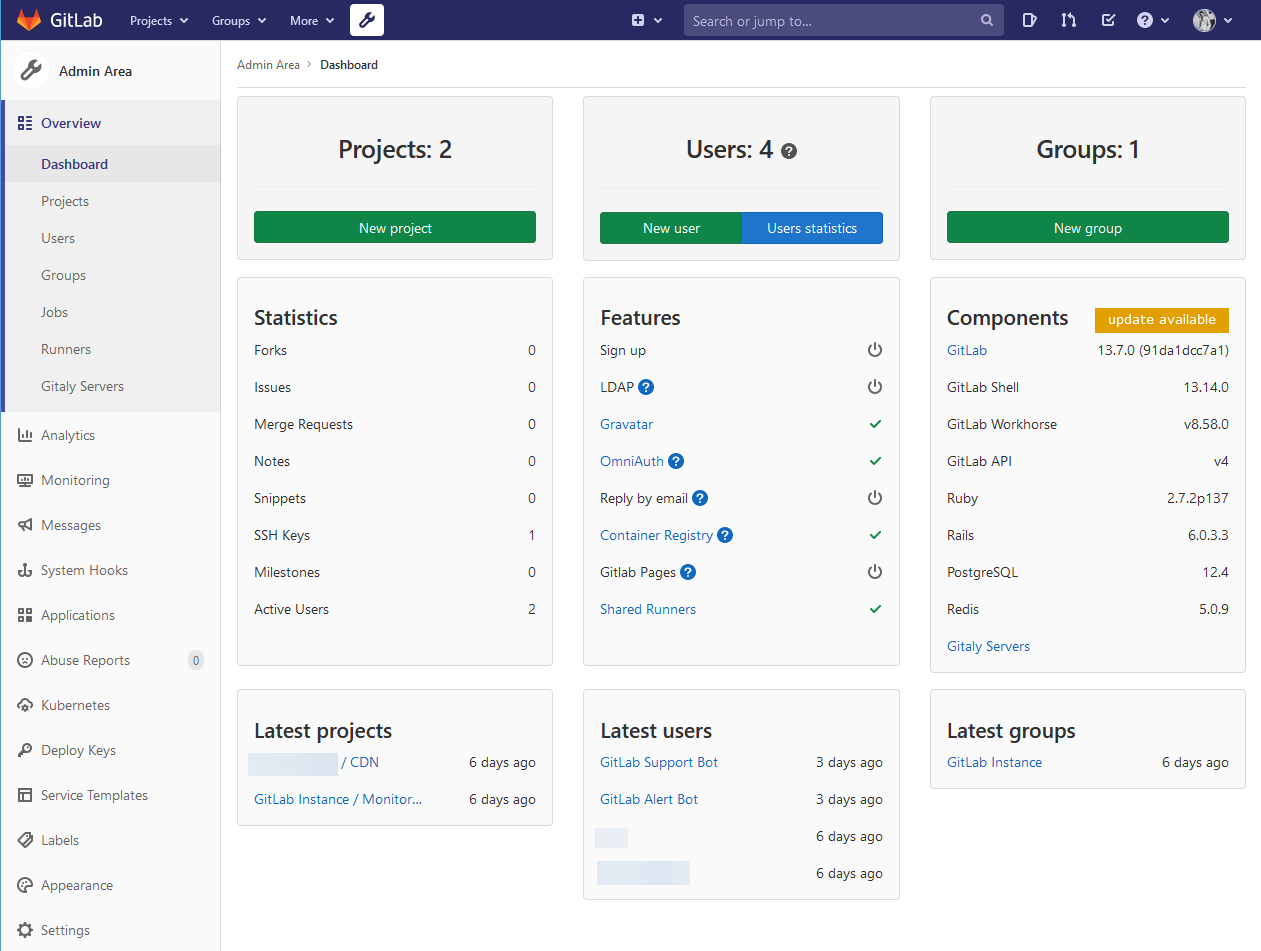
We will be utilising the admin page which can be accessed by the wrench on the top taskbar. This is so that we can setup a GitLab runner which will be used for building the dockerfiles

 —
—
Creating a GitLab runner (via Docker)
GitLab requires runners in order to compile and test your commits. In our case, they will test our dockerfile, NGINX vHost configurations and deploy to the edge nodes.
Setting this up proved to be difficult at first but after some researching I found that in order to make this work with docker we essentially have to deploy a “docker in docker” image which will pass through the hosts docker socket. In addition, we will need to make it a privileged runner otherwise it will not have the right permissions to run these tests. To begin with, head to the admin panel and then click runners.
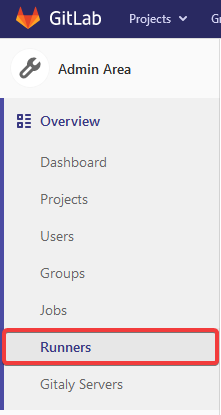
Runner tab on the left After this, you should be presented with options about adding a new runner. In this case, we want to copy the token that it provides. We should also note down the URL, which should be the same as your gitlab instance. 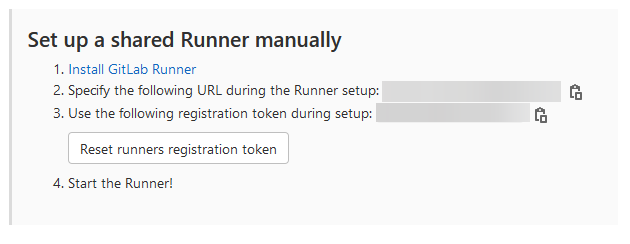 GitLab runner manual token Once we have this, head over to your Linux box and put in the following:
1
2
3
4
5
6
7
8
9
10
11
12
13
docker run --rm -it -v /srv/gitlab-runner/config:/etc/gitlab-runner gitlab/gitlab-runner register -n \

--url $GITLAB_URL \

--registration-token $REGISTRATION_TOKEN \

--executor docker \

--description "Docker Runner" \

--docker-image "docker:stable" \

--docker-privileged
This should then register the runner with your GitLab instance. However, we passed through the RM command which means it will exit after the command ends. To run the runner permanently, we need to once more run it.
1
2
3
4
5
6
7
docker run -d --name gitlab-runner --restart always

-v /srv/gitlab-runner/config:/etc/gitlab-runner

-v /var/run/docker.sock:/var/run/docker.sock

gitlab/gitlab-runner:latest
Setting up a Container Registry (Via GitLab)
The container registry on GitLab is quite simple to setup. Earlier when we deployed GitLab we passed through the port 5050 & 5555. This will be used for the container registry and a HTTP mirror of it.
To begin with, we will want to edit the file **/srv/gitlab/config/gitlab.rb **on the hostand find the following lines:
registry_external_url
registry_nginx['ssl_certificate']
registry_nginx['ssl_certificate_key']
registry_nginx['enable']
registry_nginx['listen_port']
If you are unfamiliar with basic file editing principles, do the following. It will take you to the sections of the config where these are stored:
nano /srv/gitlab/config/gitlab.rb
CTRL + W
registry_external_url
CTRL + W
registry_nginx['enable']
We then want to edit these values to the following, replacing gitlab.example.com with your instance url.
registry_external_url = ‘https://gitlab.example.com:5555’
registry_nginx['ssl_certificate'] = "/etc/letsencrypt/live/gitlab.example.com/fullchain.pem
registry_nginx['ssl_certificate_key'] = "/etc/letsencrypt/live/gitlab.example.com/privkey.pem
registry_nginx['enable'] = true
registry_nginx['listen_port'] = 5050


docker exec gitlab gitlab-ctl reconfigure
Creating the repository & GitLab CI instructions
When deploying the app to my edge nodes it first needs to be built and tested. To begin with, I added my initial NGINX configuration files then created a Dockerfile and .gitlab_ci.yml file. 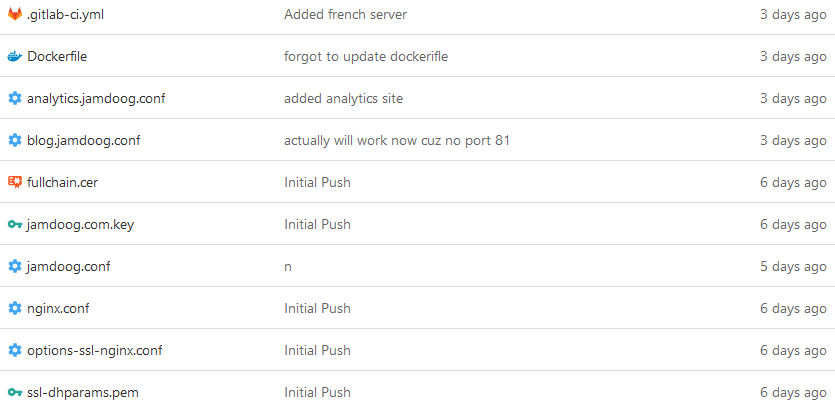 All the files in my repository. Note: This is after my pushes. The way my ‘CDN’ works is it caches a web request from my origin server and serves it. The Dockerfile will grab a nginx:mainline-alpine image and copy the vHost files to the respective directories (~/conf.d/) and then copy the SSL configuration files to ~/live/. Finally, it will test the vHost files and then start NGINX.
1
2
3
4
5
6
7
8
9
10
11
12
13
14
15
16
17
18
19
20
21
22
23
24
25
FROM nginx:mainline-alpine

RUN rm /etc/nginx/conf.d/default.conf

COPY jamdoog.conf /etc/nginx/conf.d/jamdoog.conf

COPY blog.jamdoog.conf /etc/nginx/conf.d/blog.jamdoog.conf

COPY analytics.jamdoog.conf /etc/nginx/conf.d/analytics.jamdoog.conf

COPY fullchain.cer /etc/nginx/live/fullchain.cer

COPY jamdoog.com.key /etc/nginx/live/jamdoog.com.key

COPY options-ssl-nginx.conf /etc/nginx/live/options-ssl-nginx.conf

COPY ssl-dhparams.pem /etc/nginx/live/ssl-dhparams.pem

COPY nginx.conf /etc/nginx/nginx.conf

RUN nginx -t

EXPOSE 443

CMD ["nginx", "-g", "daemon off;"]
The gitlab CI file will do the following:
Pull the Docker-in-Docker image
Define the following stages:
- Build
- Release
- Deploy
- Test
Grab the dockerfiles and build the image
Deploy the image to the container registry
Run a script on each edge node to pull the latest dockerfile and deploy it
Curl each edge node to verify the page is working
I cannot share the file because it would compromise my security but there is alot of documentation available online on how to use Gitlab CI.
Evaluation
My workflow with GitLab CD and my own container registry has created the ability to deploy changes to my edge nodes within a minute. Instead of spending 10 minutes modifying NGINX configuration files globally, all I have to do is commit a push to my GitLab server.
However, there is some minor problems with this approach. Docker is meant to be used for scalability and the way I have set this up does not attempt it properly. My original plan was to use Docker Swarm which while actually would have worked as intended, I wanted it to show the edge node at https://jamdoog.com as opposed to the master’s node. I decided I would then operate the edge nodes as independant docker masters.
Another problem with this approach is that when I deploy to my edge nodes, it is not as clean of an approach as I would like. However, in a production system I would adapt this to a method which should actually be used in production.
What I would change
When doing this whole project over again, I would absolutely reconsider the whole topology of the ‘CDN’ and how data is served. As mentioned, caching the web server works but traditional CDN’s will store assets on fast disks or even RAM. It’s quite clear that this is a makeshift solution on a budget. When services such as BunnyCDN and Cloudflare exist, it’s impossible to recommend this unless it’s strictly for learning.
However, the GitLab workflow outlined in this post is great and it is not something I would change. Obviously it is not the intended use, but it has been a greater learning curve than a couple of rsync commands in loops.
